This content uses Affiliate links. Please read my disclosure policy for more info.
If you’ve been reading, then you know that a DIY or craft happens in my house only because of my determination to get “a look for less.”
Quick, easy, inexpensive, and often repurposed projects are so my thing.
My quest for an affordable Magnolia Wreath led me to this homemade beauty. And for sure, I had budget on the brain when I grabbed some leftover wood in my garage and made my Oversized Chalkboard.
I have fancy champagne dreams on a Kirkland wine budget. It’s true. And I’m okay with that.
A recent birthday celebration for my awesome husband sent me on my typical obsessive party planning path. I can’t wait to share the details of this backyard get-together with you! Coming soon, I promise.
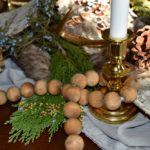
I’ve said it before, with a theme comes a color palette. An organized color palette helps tie the food, drinks, and party accessories together, giving the event some energy and life. I was really digging the idea of using natural elements mixed with gorgeous gold accents for this nighttime masculine party.
The food table was easy. I just shopped my house for linens, gold accents, and warm wood pieces. Menu planning was centered around all the things my husband loves the most. And one of his favorite treats is to sip on some Bourbon. So, a Bourbon Bar was a must.
Off I went to my little slice of heaven…my very own version of Disney World…my very own thrill ride…TJ Maxx. And like always, I hit up the clearance section.
And discovered this. 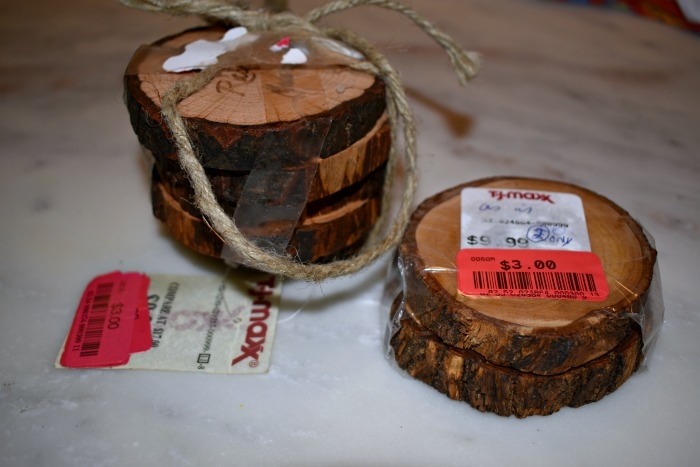 It’s stuff like this that makes me giddy with excitement!
Someone might see trash. I see something that deserves to be treasured!
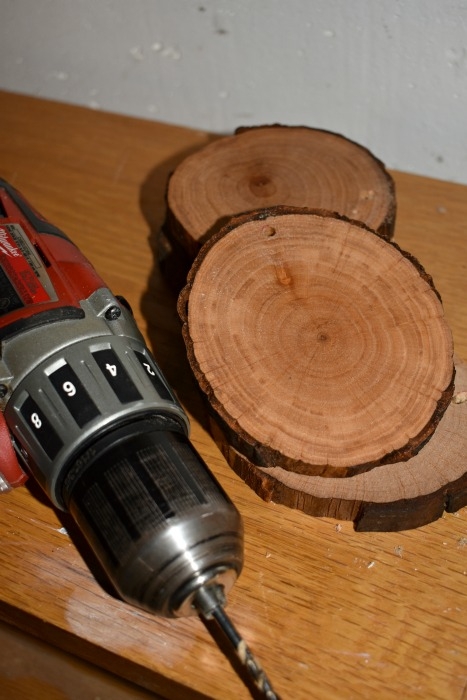
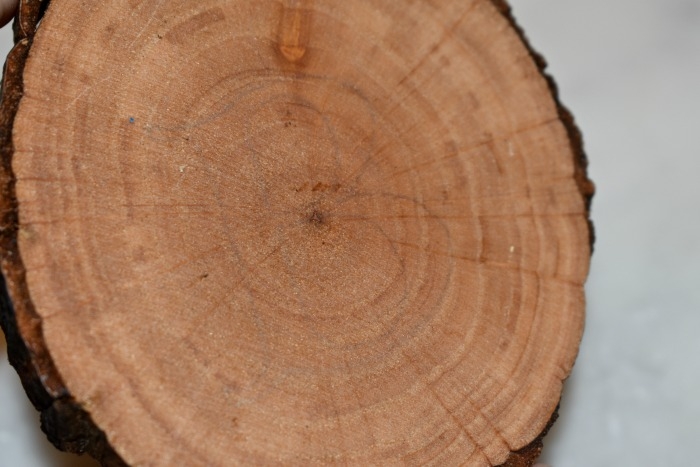
These mismatched stacks of wood slices that I assumed were meant to be used as coasters were beat up and calling for some love. I found a stack of 5 and a stack of 2 both marked at $3.00. The pricing didn’t even make sense. And lucky me, the cashier thought the same thing so I got all 7 pieces for $3.oo. Woot woot!!
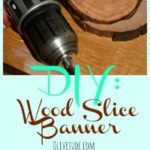
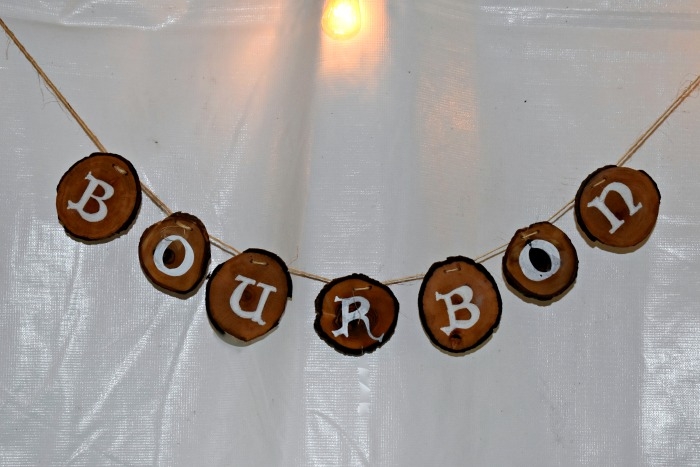
I also grabbed begged for a pallet from a local stone store. The plan was to use this as a backdrop to a Bourbon Bar that would sit separately from the main cocktail bar. I wanted to hang a wood slice banner on the pallet. So here is what I did.
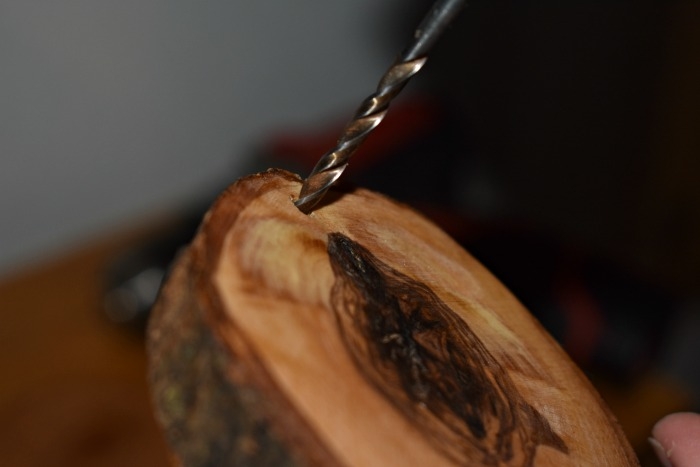
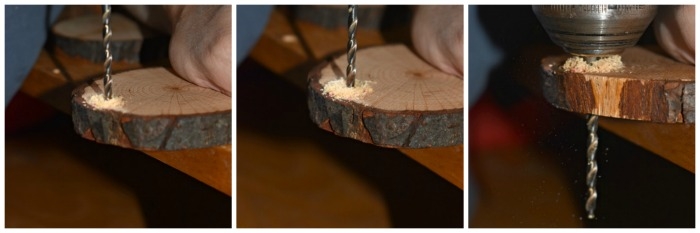
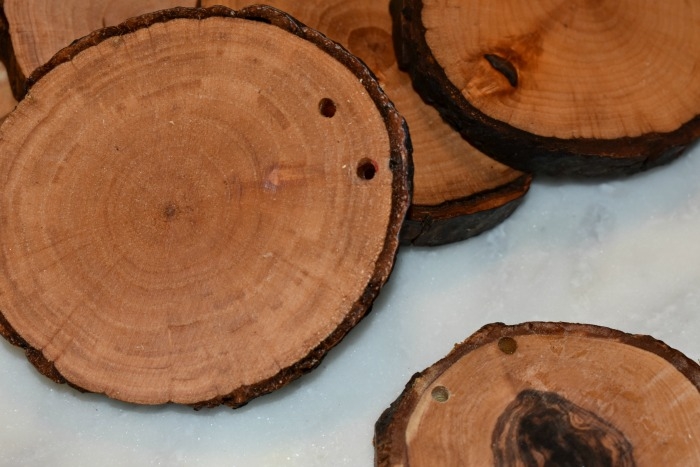
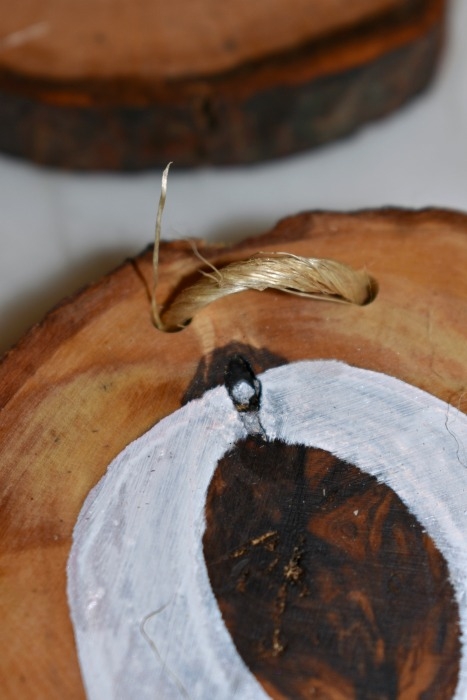
3 of the slices already had a hole at the top. I matched the hole size to the appropriate drill bit, marked the spot and started drilling 2 holes on each slice. 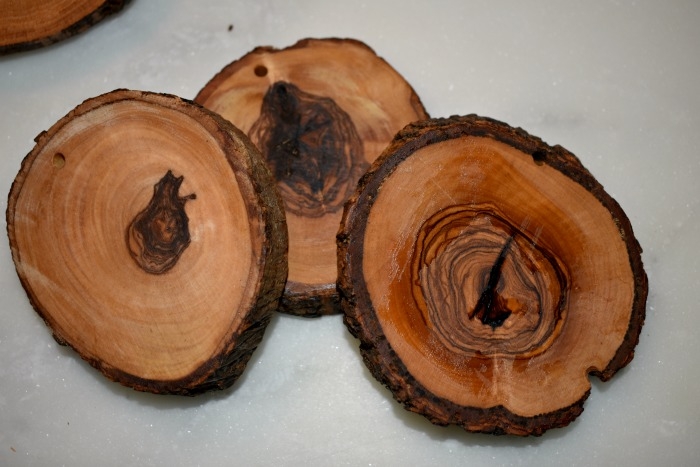
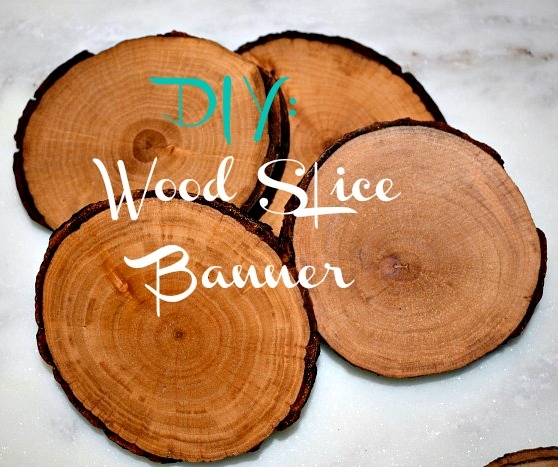
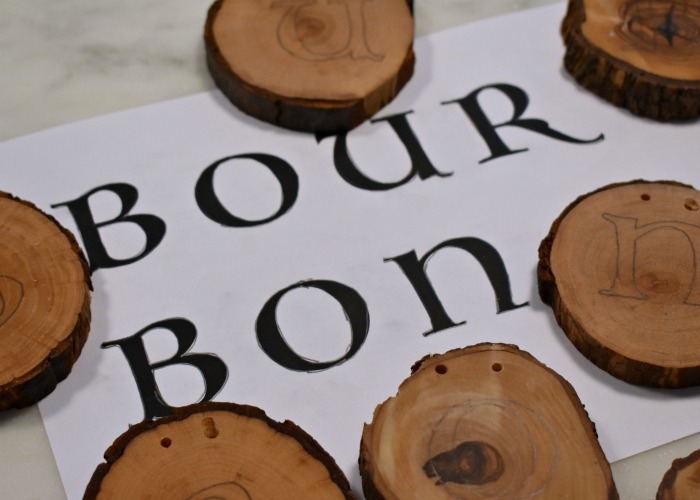
 This $3.oo find was meant to be. 7 slices of wood and 7 letters in “Bourbon.”
Oh, and did I mention these were beat up? Edges were loose or missing. Surfaces were sticky from tape.
But imperfections are good. At least that’s what I tell myself everytime I put my bathing suit on. 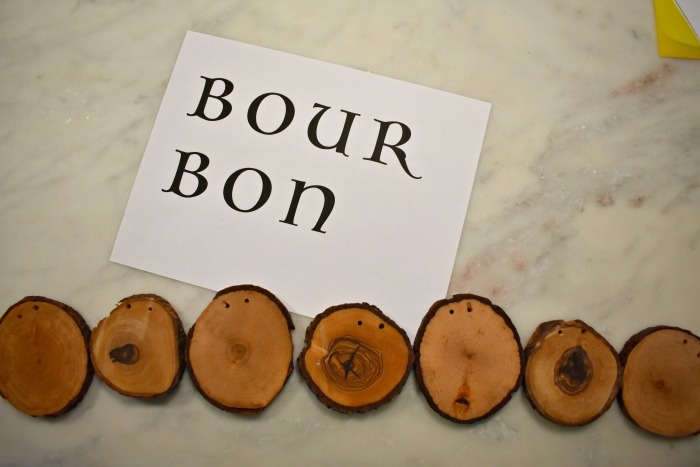
I could have freehanded the letters, but sometimes that just adds stress for me. I turned to my cheap transfer paper method by finding a font that I liked, printing it and then doing this…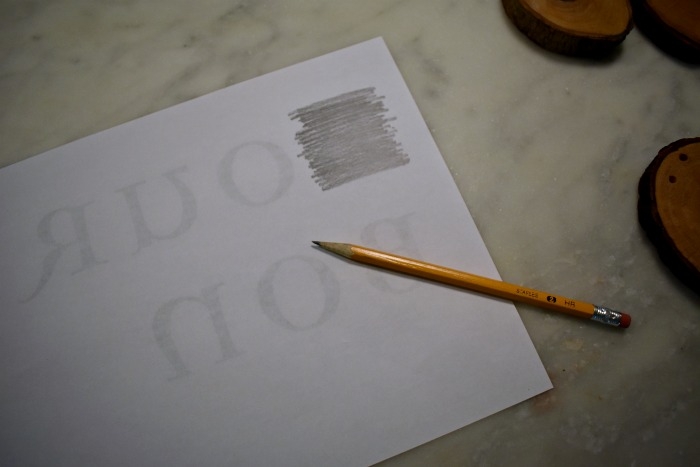 Just flip over any printed paper, give it a good scribble of pencil, flip it back and trace. Get perfect letters every time!
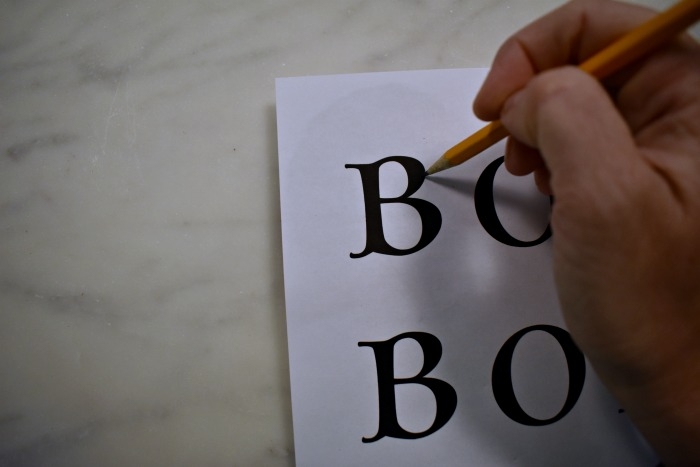
I happened to have a white paint marker on hand so without giving it a second thought, I started to trace and fill in the letters with it. The wood soaked up the paint a lot, so it required me to go back over it about 3 times. 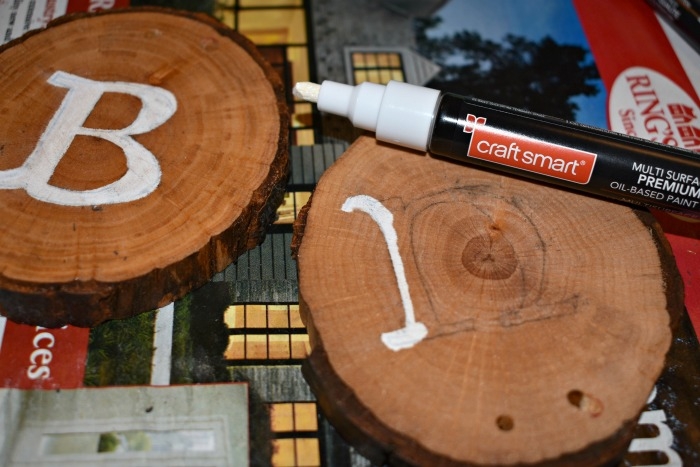 I know you can see the pencil marks still, but seriously, there’s no shame in that. Move on. No one will notice.
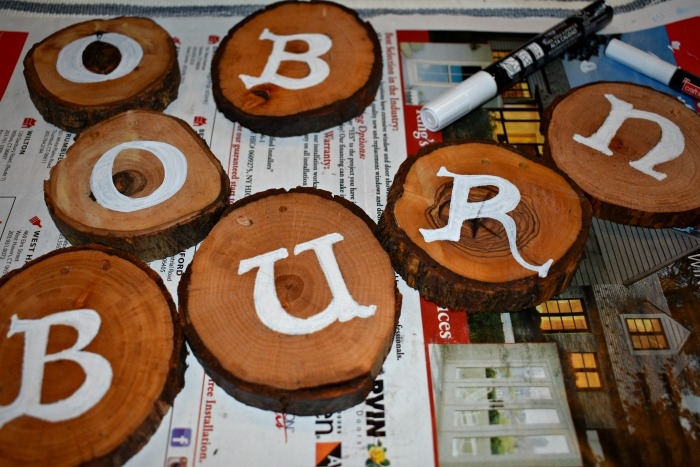 All that was left was to string em’ together! My large supply of jute twine to the rescue again!
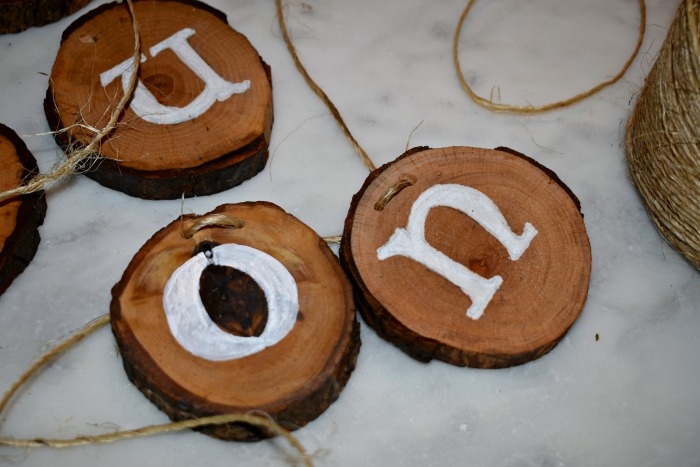
 For such a simple, quick and inexpensive project, I should have expected a slight bump in the road.
Mother Nature decided to throw a challenge at us. She dumped a a ton of rain on us the night of the party, which meant renting a tent and squashing my pallet board Bourbon Bar vision. 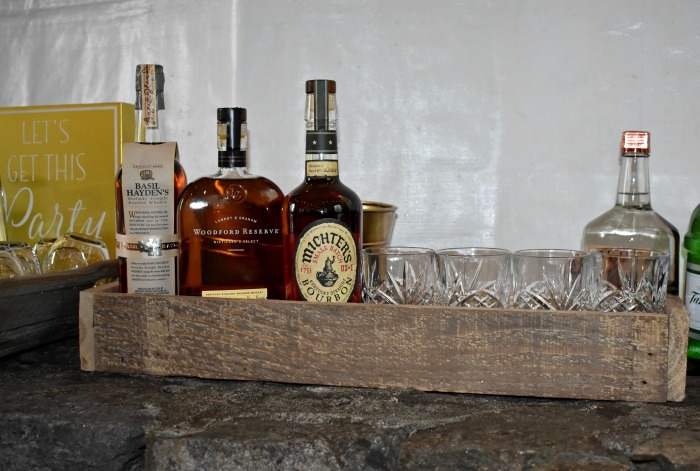 The Bourbon Bar had to be set up with the rest of the bar and this cute little wood slice banner got hung on the tent above all that. It certainly didn’t have the same effect, but it worked. And once the guests sipped on some Bourbon, I’m pretty sure they didn’t care about my $3.oo Bourbon banner anyway.
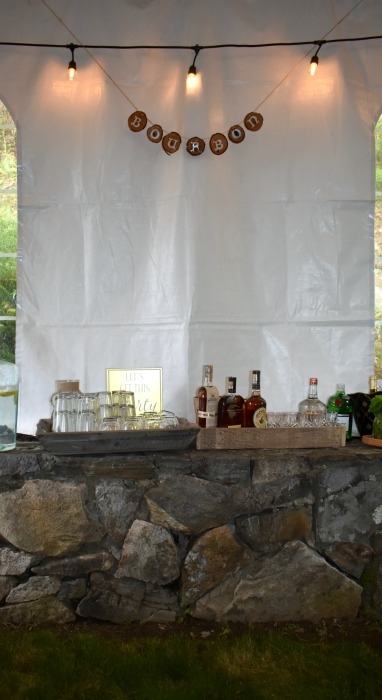
Check out more party details for this Swine and Dine: A Masculine 40th Birthday Party.
Shop similar items and make your own wood slice banner.


Seriously I’m so impressed. This is such a great idea and cost effective. You know a company would try to sell the same thing for at least 30 bucks!
Totally agree, Lorie! I love finding these busted items in clearance and giving them new life.
Very awesome idea! I love it.
Oh this is so fun! It would also be great for a woodland theme baby shower or birthday!!
Such a great suggestion! Tucking that idea away…
This is so creative! I love it!
Such an awesome, cute idea! Will definitely be making some of these with our last name! Thanks for the inspiration!
Love it! I’m hoping to do another one that isn’t advertising a bourbon bar. lol
That looks great! I love the tip about tracing the letters. I will definitely remember that!
Thanks, Julie!
Nice job on the upcycle, I love it!
Well that turned out really nice. Easy enough to make and put together. Anybody to accomplish this great looking banner.
Thanks, Candy! Yes, anyone can make this!
Oh how clever! I love these kinds of DIY/upcycle projects!
These are so cute! I love the way a paint pen looks and how user friendly they are!
This is such a cool idea! Even though I’m not a huge crafter, I feel like with your clear instructions and step by step photos this is something I could totally do! Thanks for sharing a great post.
Thanks, Caroline!!! I appreciate the feedback!
What a great idea and it turned out so cute! I love DIY projects and this would make a super cute Christmas banner come holiday times! 🙂
Thanks! Yes, I would love to make a name banner for my daughter’s room! A Christmas banner would be adorable too!
This turned out amazing! And that’s awesome that you got the slices on sale too – I love that TJ Maxx is your Disney World, lol <3
-Clarissa @ The View From Here
Thank you! Disney World, maybe a little much, huh? LOL
I absolutely love this DIY! It would make a great addition to my daughters room. Thanks for sharing!
Thank you, Mar! These wood slices would look sweet in a nursery! I was considering making one for my daughter’s room with her name on it to hang over her bed.
Even though you got rained on these still turned out super cute! Love the idea.
Thanks, Amanda! Nothing better than an inexpensive and quick DIY!
Thanks, Amanda! Nothing better than an inexpensive and quick DIY!
This is knockout Jen! So cool. The warm wood and gold looked amazing together.
Can’t wait to see details from from the rest of the party!
Thanks, Dawn! I love how it came together too!